

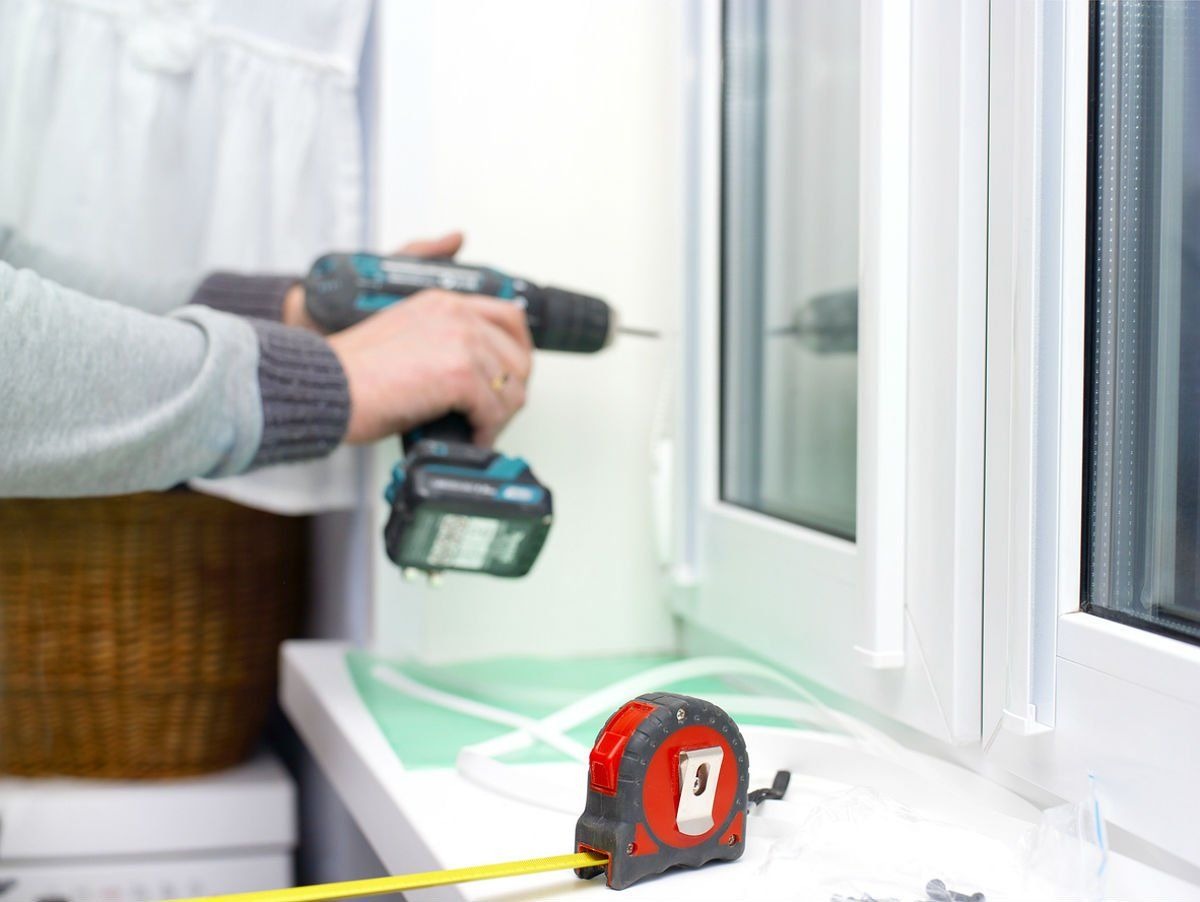
Measuring for replacement windows looks simple at first glance, but accuracy is everything. Even small errors can cascade into wrong-sized units, delayed deliveries, extra costs, and difficult installations. If you plan to handle measuring yourself, a careful method and a few safeguards will protect your timeline and your budget.
This guide explains the most common DIY measuring mistakes, why they matter, and how to measure correctly. Use it as a checklist before you place any order.
What Do We Mean By DIY Measuring Mistakes
DIY window measuring mistakes happen when the wrong points are measured or when assumptions replace verification. The most frequent issues include:
- Measuring the visible glass instead of the structural opening.
- Measuring the old sash or full unit rather than the space it fits into.
- Taking a single width or height measurement and assuming the opening is perfectly square.
- Transposing width and height on the order form.
- Measuring trim face to trim face rather than jamb to jamb.
Each of these errors can produce a window that will not fit correctly, even if it is only a little off.
Why Accurate Measurement Matters
The consequences of inaccurate window measurements range from inconvenient to extremely expensive:
- Incorrect window size: Too small leaves large gaps that need heavy shimming and foam, risking drafts and water entry. Too large will not fit without modifying the opening.
- Order delays and added cost: Custom units are often non-returnable. A single error can mean paying for a second window and waiting again.
- Installation problems: Forcing a slightly wrong size can bind hardware, stress seals, and shorten service life.
- Lost efficiency: Poor fit allows air leakage that undermines energy performance and comfort. According to Natural Resources Canada, poorly sealed windows and doors can account for up to 35 percent of total home heat loss.
Comparison: DIY vs Professional Measurement
| Parameter | DIY Measurement | Professional Measurement |
| Cost (Initial) | Free | Service Fee / Included in Quote |
| Accuracy Risk | High (especially if inexperienced) | Low (Professional takes liability) |
| Time Investment | Moderate (Learning + Measuring) | Minimal (Scheduling the visit) |
| Liability | Homeowner bears cost of errors | Installer or supplier covers mistakes |
DIY can work for simple openings if you are precise. For full-house projects, complex shapes, or older homes with movement and settling, professional measurement often pays for itself. Research by the Building Performance Institute notes that professional measurement and installation reduce the risk of air leakage and structural stress compared to self-measured openings.
How To Choose The Best Measuring Approach (The Process)
These steps apply to insert or pocket replacements where the existing main frame remains. Measuring for full-frame replacements is more complex and is best handled by an experienced installer.
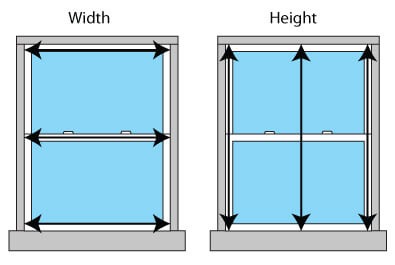
Step 1: Measure the opening width
- Place your tape between the inside faces of the side jambs.
- Take three measurements: top, middle, and bottom.
- Record the smallest number.
Step 2: Measure the opening height
- Measure from the highest point of the sill where the sash sits up to the underside of the head jamb.
- Take three measurements: left, center, and right.
- Record the smallest number.
Step 3: Check for squareness
- Measure diagonally from top left to bottom right, then top right to bottom left.
- If the diagonals differ by more than about 6 mm or 1/4 in, note that the opening is out of square. This will guide sizing, shimming, and installation strategy. A study by the University of Minnesota’s Building Science Department emphasizes that window frame squareness directly impacts seal durability and long-term energy efficiency.
Step 4: Confirm width x height format
- Always list and order windows as Width x Height.
- Double-check numbers and unit labels before submitting.
Step 5: Measure depth
- For insert replacements, measure from the inside stop to the outside blind stop to confirm there is enough pocket depth for the new frame and any accessory channels.
Step 6: Apply sizing deductions correctly
- Replacement units are typically ordered slightly smaller than the smallest width and height to allow for fit, shimming, and sealant.
- Typical deductions are 1/4 in to 1/2 in, but always follow the manufacturer’s or supplier’s guidance.
Step 7: Document everything
- Label each opening with a room name and orientation.
- Record three widths, three heights, both diagonals, depth, and final ordered size for each opening.
Common DIY Window Measuring Mistakes To Avoid
Here are the specific errors homeowners frequently make:
- Measuring the glass only: The visible pane is not the ordering size. Always measure jamb to jamb.
- Measuring the old sash or unit size: Remove sash measurements from your process. You need the structural opening size.
- Single-point measuring: Openings settle and bow. Take three widths and three heights and use the smallest of each.
- Skipping diagonals: Out-of-square openings are common, especially in older homes. Diagonals reveal it.
- Mixing up width and height: Confirm W x H on every line item. A single reversal changes the product entirely.
- Measuring trim-to-trim: Casing widths vary and do not reflect the structural opening.
- Wrong deductions: Guessing at deductions can lead to gaps or a unit that is too tight. Follow manufacturer tables or written supplier guidance.
Discussion: Is DIY Measurement Worth The Risk
If you are replacing a few standard windows and feel confident with tools and careful note-taking, DIY sizing can be successful. The key is discipline: multiple measurements, documented diagonals, verified depth, correct deductions, and a meticulous ordering review.
However, the financial risk is real. A single custom window ordered to the wrong size can cost more than a professional measuring visit for the entire project. For full-house replacements, complex configurations, bay and bow units, egress windows, or any scenario with visible settling, professional measurement is a smart insurance policy that shifts liability away from you.
Frequently Asked Questions (FAQ)
1. What should I consider when measuring windows myself?
Focus on measuring the narrowest part of the actual window opening (jamb-to-jamb width, sill-to-head height), measure in multiple places, check for squareness with diagonal measurements, and record dimensions correctly as Width x Height. Understand the difference between insert and full-frame measurements. Avoid common mistakes like measuring the glass only or the old sash.
2. How do I ensure accuracy when measuring?
Use a quality tape measure. Measure each dimension (width, height) at least three times (top/middle/bottom or left/middle/right) and use the smallest measurement. Measure diagonals to check if the opening is square. Double-check your numbers and the W x H order before ordering.
3. What are the advantages and disadvantages of DIY window measuring?
- Advantages: No upfront cost for the measurement service; allows for direct ordering from suppliers if desired.
- Disadvantages: High risk of costly errors if inexperienced; homeowner is fully liable for mistakes; can be time-consuming; may not identify underlying issues an installer would spot.
Conclusion
Accurate measuring is the foundation of a smooth window replacement. The difference between a painless install and a costly re-order is often a few millimeters and one missing diagonal. If you decide to measure yourself, follow a strict process: three-point width and height, diagonal checks, depth confirmation, correct deductions, and careful W x H recording. For larger scopes, specialty shapes, or older homes, consider professional measurement to shift liability and protect your budget.
A careful approach now prevents delays, protects energy performance, and ensures your new windows operate smoothly and look right for years to come.